One of the easiest and most rewarding ways to turn kitchen scraps into rich, living compost that plants love is to farm worms, which is also called vermicomposting.
Worm farming can greatly improve your soil and cut down on trash in your home, no matter how big or small your garden is.
Even though it’s not hard, beginners often don’t know where to start: What kind of worms should you use? What do you need to give them to eat? How do you keep bugs and smells away?
Even if you’ve never composted before, this complete guide will show you everything you need to know to start and run a successful worm farm.
What is worm farming?
Worm farming is the process of using composting worms to turn organic waste into castings (worm manure) and liquid fertilizer that are full of nutrients. These items are some of the best natural soil conditioners on the market.
Worm castings make the soil better by changing its structure, increasing microbial activity, making nutrients more available, and holding more water.
Worm farms are faster than regular compost piles, don’t take up much space, and can be used all year long, even inside if you need to.
Why Should You Start a Worm Farm?
Gardeners love worm farming for a lot of good reasons:
1. Makes high-quality fertilizer
People say that worm castings are one of the best organic fertilizers you can buy. They have the right amount of nutrients, helpful microbes, and natural plant growth boosters.
2. Cuts down on trash in the house
Food scraps that would normally end up in a landfill can be turned into something useful. Worm composting can help many families get rid of a lot of their weekly trash.
3. Naturally makes the soil healthier
Using worm castings on a regular basis makes the soil better, encourages helpful microorganisms, and helps plants grow stronger and more resilient.
4. Doesn’t take much work
Once a worm farm is set up, it only needs to be fed and cleaned every now and then.
5. Good for small areas
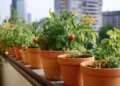
People who live in apartments can even keep small worm bins on their balconies or patios.
Picking the Right Worms For Your Worm Farm
Some worms are not good for composting. For instance, garden earthworms don’t usually do well in worm bins. The best worms for composting are those that live on the surface and eat dead plants and animals.
The species that people use the most are:
- Red wigglers (Eisenia fetida)
- European nightcrawlers (Eisenia hortensis)
- Tiger worms (a common type of composting in the UK)
Red wigglers are the most popular because they breed quickly, can live in a wide range of conditions, and eat food quickly.
For a small household system, 250 to 500 grams of worms is enough to get started. Bigger systems can start with more worms.
Picking or Making a Worm Farm
You can buy worm farms that are already built or make your own at home. Stackable trays are common in commercial systems because they make it easy to collect compost.
You can also make your own bins out of plastic containers, wooden boxes, or old storage tubs.
A good worm farm should have:
- Holes for drainage to keep water from pooling
- Airflow through ventilation
- A lid that keeps bugs out and moisture in
- A tray or system to catch worm tea, a type of liquid fertilizer
The size of the bin depends on how much trash you throw away. Once the system is fully set up, one square foot of surface area can handle about 0.5 kg of food scraps per week.
Getting the worm farm bedding ready
Make a comfortable layer of bedding before adding worms. Bedding is where worms live, and it helps keep the moisture level stable.
Some good bedding materials are:
- Shredded newspaper or cardboard that isn’t shiny
- Coconut coir
- Aged compost
- Mould on leaves
- Chopped straw
Make the bedding feel like a wrung-out sponge by wetting it down so it doesn’t drip. Fill the bin loosely, leaving some space for air to get in. Then put the worms on top and give them time to dig into their new home on their own.
It’s best to wait a day or two before feeding the worms for the first time.
What to Feed Your Worms
Worms love to eat a lot of different kinds of plant-based food scraps.
Here are some great choices:
- Peelings from fruits and vegetables
- Ground coffee and paper filters
- Tea bags without plastic
- Eggshells that have been crushed
- Soft pieces of garden waste
- Small amounts of bread
Cutting scraps into smaller pieces helps worms break down food faster and speeds up the process of decomposition.
Foods to avoid:
Some things can smell bad, attract bugs, or hurt worms.
Don’t add:
- Fish or meat
- Dairy foods
- Foods that are oily or greasy
- A lot of citrus
- Too many onions and garlic
- Animal waste
- Foods with a lot of salt
It’s important to use moderation. Most materials are fine in small amounts, but balance is what keeps the system healthy.
How often should you give worms food?
One mistake that many beginners make is feeding their pets too much. Worms need time to digest food, and if they have too many scraps, they can rot before they eat them, which can make the smell bad.
Start by giving them small amounts of food once or twice a week. Watch how quickly the food goes away and make changes slowly. The more worms there are, the more food they can eat.
The bury-and-rotate method is easy: every time you feed, put scraps in a different corner of the bin. This keeps activity even and stops overfeeding in one area.
Keeping the Right Conditions
Worm farms do best when certain conditions are kept in the environment.
Moisture
Worms need a wet place to live and breathe through their skin. The bedding should stay wet, like a sponge that has been squeezed. If it gets dry, lightly mist it with water. Add dry shredded paper to soak up extra moisture if it’s too wet.
Temperature
The best temperature range for most composting worms is between 12°C and 25°C. Very hot or very cold weather can slow things down or hurt the worms. In the winter, putting the bin in a protected area helps keep it productive. In the summer, the bin may need shade.
Airflow
Good ventilation keeps smells away and helps good microbes grow. Make sure that air holes stay open and don’t press bedding down too tightly.
Keeping Smells and Bugs Away
A worm farm that is well taken care of should smell like dirt, not bad. Odors usually mean that something is out of balance.
Some common reasons are:
- Giving too much food
- Bad drainage
- Too much moisture
- Too much acid
The answers are easy:
- Get rid of extra rotting food
- Put in dry bedding
- Make the air flow better
- Cut back on feeding for a while
Always bury food scraps under bedding and keep the lid closed to keep fruit flies away.
Learning about how worm populations grow
One of the most interesting things about worm farming is how quickly the number of worms can grow. When conditions are right, composting worms breed steadily, which makes your system work better over time.
In a few weeks, cocoons hatch, and the young worms grow up quickly. Eventually, the bin’s population levels off at a natural level based on how much space and food is available.
You can split the colony and start a new bin, share worms with friends, or make your setup bigger if worms start to crowd the system.
Getting Worm Castings
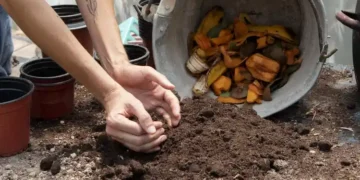
The bedding will slowly turn into dark, crumbly compost called worm castings after a few months. The way you harvest depends on the type of bin.
Tray Systems
In stackable tray systems, all you have to do is put a new tray with fresh bedding and food on top of the one that is already there. Worms move up, which lets you take the lower tray out and use it.
Separating by hand
For simple bins, put the finished compost on one side and the new bedding and food on the other. Worms will move toward the new food source over time, making the compost ready to be picked up.
Some gardeners also use the light-separation method. They put compost in small piles in bright light, which makes worms move down, so they can slowly harvest the top layer.
How to Use Worm Castings in the Garden
Worm castings are safe to use on almost any plant because they won’t burn the roots.
Some common uses are:
- Mixing into soil for pots
- Adding to the top of garden beds
- Making planting holes bigger
- Making compost tea for watering plants
- Bringing new life to tired container plants
Even small amounts can make plants grow better and make the soil healthier.
Collecting Worm Tea
A lot of worm farms make a liquid by-product that people call worm tea or leachate. It can be used as a soil drench or fertilizer if it is mixed with the right amount of water.
Always mix with water first, usually one part liquid to ten parts water, and then apply to the soil instead of directly to the leaves.
Regular draining keeps the system from getting too wet.
Fixing Common Problems
Worms Trying to Get Away
Worms sometimes explore their surroundings in new systems. This usually goes away in a few days. If animals keep trying to escape, it could mean that the conditions are not right, like too much heat, moisture, or acidity.
Slowly breaking down
If food scraps stay the same for a long time, the system may need:
- More worms
- Higher temperatures
- Smaller pieces of food
- Feeding in a balanced way
- Presence of Other Bugs
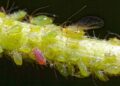
It’s common for small bugs to show up on their own in composting systems. Most of them are harmless and are part of the ecosystem that breaks things down. Keeping things in good shape keeps populations stable.
Adding to Your Worm Farming System
Many gardeners add to their worm composting systems once they are comfortable with the basics so they can handle more waste or make compost for bigger gardens.
Some choices are:
- Adding more bins
- Making worm beds outside
- Using worm composting in the greenhouse
- Sharing systems with neighbors or community gardens
When more organic waste is processed locally, less goes to the landfill. This means that there is more rich compost available for gardening.
Worm farming is good for the environment.
Worm farming is good for more than just your garden; it’s good for the whole environment. Landfills with organic waste make methane, a very strong greenhouse gas.
Composting at home helps cut down on these emissions and puts nutrients back into the soil where they belong.
Worm composting also helps people learn more about soil ecology and encourages gardening practices that don’t use as many synthetic fertilizers.
FAQs
1. What type of worms are best for worm farming?
Red wigglers (Eisenia fetida), tiger worms, and European nightcrawlers are the best worms for composting. Regular garden earthworms don’t work because they like to live deep in the ground instead of in compost bins.
2. How much food can worms eat?
Worms can eat about half of their body weight in food every day if the conditions are right. But people who are just starting out should feed lightly at first and then slowly increase the amount as the worm population grows and the food goes away faster.
3. Does a worm farm have a smell?
A healthy worm farm should smell like fresh dirt or earth. If your system smells bad, it’s probably too wet, overfed, or not getting enough air. Usually, changing the amount of moisture and cutting back on feeding will fix the problem quickly.
4. Is it possible to have a worm farm inside?
Sure. As long as the temperatures stay moderate and the bin is well cared for, worm farms can be kept indoors, on balconies, or in garages. Indoor systems often work very well because they don’t have to deal with bad weather.
5. What foods should I not give worms?
Stay away from meat, dairy, greasy foods, foods with a lot of salt, and foods with a lot of citrus or onions. These things can make smells, bring in pests, or throw off the system’s balance.
6. How long does it take to make compost?
Depending on the temperature, how often they are fed, and how many worms there are, most worm farms start making worm castings that can be used in 2 to 4 months.
7. Do worms have babies quickly?
Yes. In good conditions, composting worms reproduce steadily, and their numbers can double in just a few months. In the end, the system finds a natural balance based on the food and space it has.
8. What should I do if worms try to get away?
When worms are first put in a new bin, they may move around for a short time. If an animal keeps trying to escape, it usually means that the conditions aren’t right, like too much moisture, too much acidity, too much heat, or not enough food. Fixing these things usually solves the problem.
9. Is it okay to put garden waste in a worm farm?
Yes, but only add soft things like leaves, grass clippings (in small amounts), and plant trimmings. You should compost tough, woody materials separately because they don’t break down fast enough for worm bins.
10. What do I do with the worm compost in my garden?
You can mix worm castings into potting soil, add them to planting holes, sprinkle them around plants that are already growing, or brew them into compost tea. Even small amounts make a big difference in the health of the soil and the growth of plants.
Last Thoughts: Little Work, Big Rewards
One of the easiest ways to be a more eco-friendly gardener and make your plants much healthier is to start a worm farm. You can turn trash into powerful natural fertilizer with just a small container, some composting worms, and regular kitchen scraps.
Moderate feeding, the right amount of moisture, and regular observation are all important for success. Once you have these basics down, worm farming becomes a system that doesn’t need much care and almost runs itself.
Using worm composting can make a big difference in the quality of your soil and the health of your plants, whether you grow vegetables, flowers, container plants, or a whole backyard garden.
A lot of people who start worm farming to cut down on waste soon find that the best thing about it is the amazing compost it makes. It’s rich, living soil that helps gardens grow.
Start small, watch your system, and let the worms grow on their own. Soon, you’ll have a steady supply of one of the most important things for gardening, which is a big step toward a healthier, more sustainable garden.