There are few things more frustrating than nurturing a tomato plant all summer, watching the flowers appear, seeing tiny green tomatoes develop, and then discovering that the bottom of one has turned brown, black, sunken, and rather horrible.
I’ve been there, and if you’ve ever experienced blossom end rot, you’ll know exactly what I mean.
The good news is that blossom end rot looks much worse than it actually is. It isn’t a contagious disease, it doesn’t mean your whole plant is doomed, and you usually don’t need to pull the plant out of the garden. In fact, once I understood what was really happening, I found blossom end rot much easier to prevent.
So, what causes it, and what can we do about it?
Learn more about Pest and Disease Managment >
What Is Blossom End Rot?
Blossom end rot is a dark, sunken patch that develops on the blossom end of a fruit. On tomatoes, this is the end opposite the stem.
It often starts as a small, pale brown or water-soaked-looking patch. As it develops, the area becomes darker, leathery, sunken, and sometimes almost black.
Although tomatoes are probably the fruit most associated with blossom end rot, I’ve also seen it discussed with peppers, eggplants, squash, cucumbers, and other fruiting plants.
One of the biggest misconceptions is that blossom end rot is a fungal or bacterial disease.
It isn’t.
Instead, it is generally associated with a calcium-related problem within the developing fruit. The important part, however, is that the issue isn’t necessarily a lack of calcium in the soil.
That distinction is incredibly important.
What Actually Causes Blossom End Rot?
The simplest way I think about blossom end rot is this:
The plant may have enough calcium available, but it isn’t getting enough calcium to the developing fruit when it needs it.
Calcium moves through plants largely with water. So anything that interferes with consistent water uptake can contribute to the problem.
This is why watering habits are often more important than simply adding calcium.
A plant can have plenty of calcium in the soil and still develop blossom end rot if its water supply keeps fluctuating.
For example, imagine a tomato plant growing beautifully during a warm week. I water it regularly, but then life gets busy and I forget for a couple of days. The soil becomes quite dry.
Then we get a heavy rainstorm.
The plant suddenly has plenty of water again, but the earlier fluctuations may already have affected calcium movement to rapidly developing fruit.
This is one reason I pay much more attention to consistent moisture now than I used to.
The Biggest Culprit: Uneven Watering
If I had to pick one thing to concentrate on when trying to prevent blossom end rot, it would be consistent watering.
Tomatoes don’t particularly enjoy swinging between extremes of drought and abundance.
Letting the soil become bone dry before giving the plant a huge drink isn’t ideal.
At the other extreme, keeping the soil constantly saturated isn’t helpful either.
What I want is reasonably even moisture around the roots.
During hot, dry weather, that can mean watering more frequently. During cooler or wetter periods, I naturally need to water less.
The goal isn’t to follow a rigid watering schedule regardless of weather. It’s to pay attention to the soil and keep moisture relatively consistent.
Can Too Much Water Cause Blossom End Rot?
This one can be confusing.
You might assume that if blossom end rot is associated with calcium movement and water, simply giving your plants more water will solve everything.
Unfortunately, it isn’t quite that straightforward.
Overwatering can damage roots and reduce their ability to function properly. Constantly waterlogged soil can also create an unhealthy root environment.
So I don’t think of the solution as “more water.”
I think of it as steady, appropriate moisture.
That’s a much better way to approach it.
Does a Lack of Calcium Cause Blossom End Rot?
This is where things get interesting.
A calcium deficiency can contribute to blossom end rot, but simply assuming that your soil needs more calcium isn’t necessarily the answer.
In many gardens, there is already sufficient calcium in the soil. The problem is that the plant isn’t transporting enough of it to the developing fruit.
That’s why adding calcium to the soil isn’t a magic cure for every case of blossom end rot.
Before I start adding amendments, I prefer to think about the growing conditions first.
Is the plant drying out?
Am I watering inconsistently?
Has there been an extended period of hot weather?
Is the soil excessively wet?
Have I disturbed the roots?
Is the plant growing extremely quickly?
These questions can tell me much more than simply looking at the damaged fruit.
Why Rapid Growth Can Make the Problem Worse
I’ve noticed that blossom end rot can be particularly annoying when plants are growing rapidly.
A young tomato plant can suddenly put on an enormous amount of growth during warm weather. At the same time, it may be producing flowers and developing several fruits.
All of this requires water and nutrients.
When fruit is developing rapidly, the plant needs a steady supply of resources. If something interrupts that process, the developing fruit can be particularly vulnerable.
This is another reason I try to avoid creating dramatic changes in growing conditions.
How I Prevent Blossom End Rot
The good news is that prevention doesn’t have to be complicated.
Here are the things I concentrate on.
1. Keep the Soil Evenly Moist
This is my number-one strategy.
I check the soil around my plants rather than automatically watering because it’s a particular day of the week.
If the surface looks dry, I check a little deeper. The top inch or so can dry out surprisingly quickly while the soil underneath remains moist.
During hot weather, containers can dry out particularly fast, so I check them more often.
The important thing is to avoid the cycle of:
bone dry → enormous watering → bone dry → enormous watering.
I’d much rather keep moisture reasonably consistent.
2. Mulch Around My Plants
Mulching is one of my favorite simple gardening tricks.
A layer of suitable organic mulch around tomato and pepper plants can help slow evaporation from the soil.
That means the soil doesn’t dry out as quickly during hot weather, which can make maintaining consistent moisture much easier.
I make sure the mulch isn’t piled directly against the stem. Instead, I leave a little space around the base of the plant.
Mulch can also help reduce weeds, which means less competition for water.
3. Water at Soil Level
When I water, I try to direct the water toward the soil around the roots rather than repeatedly spraying the entire plant.
A slow, thorough watering is generally more useful than a quick sprinkle over the surface.
This is especially important with containers, where water can sometimes run down the sides and leave parts of the root ball surprisingly dry.
4. Avoid Damaging the Roots
Tomatoes have extensive root systems, and I try not to disturb them unnecessarily.
When planting, I handle the root ball carefully.
Later in the season, I’m cautious when hoeing, digging, or cultivating around established plants.
Damaging roots can interfere with water and nutrient uptake, so there is little benefit in aggressively digging around a mature tomato plant.
5. Don’t Overdo Fertilizer
It’s tempting to think that more fertilizer equals more tomatoes.
Unfortunately, that’s not always how gardening works.
Too much fertilizer can encourage excessive leafy growth and may create nutrient imbalances.
I prefer to use a fertilizer appropriate for fruiting plants and follow the directions rather than assuming that doubling the amount will double my harvest.
A healthy plant isn’t necessarily the plant with the biggest possible leaves.
6. Give Plants Enough Space
Good spacing isn’t just about making the garden look tidy.
Crowded plants can compete for water and nutrients, while dense growth can also make watering and general plant care more difficult.
I follow the spacing recommendations for the variety I’m growing.
If I have a choice, I prefer to give tomato plants enough room to develop a healthy root system and good airflow.
What Should I Do If My Tomato Already Has Blossom End Rot?
This is the part that initially confused me.
If a tomato already has blossom end rot, I can’t reverse the damaged tissue.
Once that brown, sunken patch has developed, it’s there.
So I remove badly affected fruit rather than waiting for it to magically repair itself.
This allows the plant to concentrate on producing new growth and fruit.
More importantly, I look at the conditions that may have caused the problem.
I check the soil moisture.
I think about whether the plant has been allowed to dry out.
I look at recent weather.
I consider whether I accidentally damaged the roots.
And I make sure the plant isn’t being overfertilized.
The next fruits may develop perfectly normally once growing conditions become more consistent.
Can You Eat Tomatoes With Blossom End Rot?
This is one of the questions I always want answered when I see a damaged tomato.
If a tomato has a small area of blossom end rot, I don’t necessarily consider the entire fruit unusable.
However, I don’t eat the affected, damaged tissue. I cut away the damaged portion generously and inspect the rest of the tomato carefully.
If the fruit has extensive damage, secondary mold, an unpleasant smell, or looks otherwise spoiled, I discard it.
I also don’t confuse blossom end rot with ordinary rot caused by pathogens. Once damaged tissue is present, other organisms can move in.
When in doubt, I throw it away.
Does Blossom End Rot Spread From Plant to Plant?
No, blossom end rot isn’t something that spreads around the garden like an infectious disease.
If I find it on several tomato plants, I don’t assume that one plant has infected another.
Instead, I look for a shared environmental cause.
Perhaps we’ve had a prolonged dry spell.
Maybe the plants are all growing in the same type of soil.
Perhaps they’re all in containers that dry out rapidly.
Or maybe my watering routine has been inconsistent.
Seeing blossom end rot across multiple plants is actually a useful clue. It tells me to look at the growing conditions rather than reaching for a fungicide.
What About Epsom Salts?
I’ve seen Epsom salts recommended for all sorts of tomato problems, including blossom end rot.
I wouldn’t use them as a cure.
Epsom salts contain magnesium sulfate, not calcium. Adding magnesium when a plant doesn’t need additional magnesium can potentially interfere with the balance of other nutrients.
So I wouldn’t sprinkle Epsom salts around my tomatoes simply because I’ve spotted blossom end rot.
I’d much rather concentrate on watering, soil health, appropriate feeding, and good growing conditions.
Should I Add Lime?
Garden lime contains calcium, so it sounds like an obvious solution.
But again, I wouldn’t automatically add it.
If the soil already contains adequate calcium, adding more isn’t necessarily going to solve the problem.
Too much lime can also affect soil pH, potentially creating other nutrient-availability issues.
If I genuinely suspect a soil nutrient imbalance, a soil test is much more useful than guessing.
That’s one of the biggest lessons I’ve learned as a gardener: test before treating whenever possible.
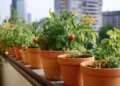
Can Container Tomatoes Get Blossom End Rot?
Absolutely.
In fact, containers can make consistent moisture more challenging.
A tomato plant growing in a pot has a limited amount of soil, and that soil can dry out remarkably quickly during warm, sunny weather.
I’ve found that container-grown tomatoes need particularly close attention during hot spells.
The container itself matters too. Small pots dry out more quickly than large ones, and plants with vigorous root systems can use up available moisture surprisingly fast.
If I grow tomatoes in containers, I make sure the pot is large enough for the variety and keep a closer eye on moisture during hot weather.
What About Tomatoes Grown in the Ground?
Tomatoes grown directly in the garden can still develop blossom end rot.
The advantage is that a large volume of garden soil generally holds moisture better than a small container.
However, the soil itself can still become extremely dry, particularly during a hot summer.
This is where mulch becomes particularly useful.
I also pay attention to the soil structure. Healthy soil containing organic matter generally holds moisture more effectively while still allowing excess water to drain away.
Does Blossom End Rot Affect Every Tomato?
Thankfully, no.
Sometimes I find one or two affected fruits among a perfectly healthy crop.
Other times, several fruits can be affected.
The timing can vary too.
It may appear on the first tomatoes of the season and then disappear as the plant settles into more stable growing conditions.
That can be a relief because it means seeing one damaged tomato doesn’t automatically mean the entire harvest is going to fail.
Which Plants Are Most Commonly Affected?
Tomatoes are the classic example, but blossom end rot can also occur in other fruiting vegetables.
I’ve particularly seen it associated with:
Tomatoes
Peppers
Eggplants
Squash
Cucumbers
Melons
The underlying issue is similar: developing fruit doesn’t receive adequate calcium at the right time, often in association with inconsistent water availability.
Does Blossom End Rot Mean My Soil Is Bad?
Not necessarily.
I think this is worth emphasizing because seeing damaged fruit can make us immediately blame the soil.
Blossom end rot doesn’t automatically mean that the garden soil is poor.
Even a wonderfully fertile garden can experience the problem if watering conditions fluctuate.
Equally, a plant growing in decent potting mix can develop blossom end rot if its container repeatedly dries out.
I now look at the whole growing environment rather than blaming one particular factor.
My Simple Blossom End Rot Prevention Checklist
When I’m growing tomatoes, peppers, or other susceptible crops, I keep things fairly straightforward.
My checklist looks like this:
Keep moisture consistent.
I don’t let the plants repeatedly dry out completely before watering.
Mulch the soil.
This helps slow evaporation and keeps moisture more stable.
Water thoroughly.
I want water reaching the root zone rather than simply wetting the surface.
Avoid waterlogged soil.
Consistent moisture doesn’t mean permanently soggy soil.
Don’t damage roots.
I’m careful when cultivating around established plants.
Feed sensibly.
I use appropriate fertilizer without overdoing it.
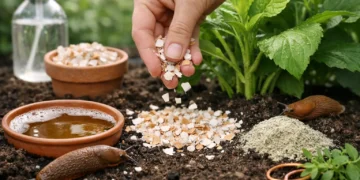
Don’t automatically add calcium.
If I suspect a deficiency, I’d rather test the soil first.
Watch container plants closely.
Pots can dry out rapidly, especially in hot weather.
Remove severely damaged fruit.
It won’t heal, so I concentrate on helping the plant produce healthy new fruit.
What I Wish I’d Known About Blossom End Rot
If I could go back to my early gardening days, I’d tell myself not to panic the first time I saw a tomato with a black patch on the bottom.
My first instinct would probably have been to assume that something was terribly wrong.
Now I know that blossom end rot is often a sign that the plant has struggled with water and calcium movement during fruit development.
It doesn’t necessarily mean my soil is deficient.
It doesn’t mean my plants have a contagious disease.
And it certainly doesn’t mean I have to give up on the crop.
Instead, it’s a useful warning sign.
When I see blossom end rot, I take a step back and look at what’s happening around the plant. Is the soil drying out too much? Has the weather suddenly become hot? Have I been watering inconsistently? Is the plant growing in a container that’s too small? Have I been overfeeding?
Quite often, the answer is hiding somewhere in those questions.
Blossom End Rot FAQs
1. Is blossom end rot a disease?
No. Blossom end rot is generally considered a physiological disorder rather than an infectious disease. It is associated with insufficient calcium reaching developing fruit, often because of problems with water uptake or inconsistent moisture.
2. Can a tomato recover from blossom end rot?
The damaged area won’t heal. However, the plant can continue growing and produce healthy new fruit once the underlying growing conditions improve.
3. Should I remove tomatoes affected by blossom end rot?
I usually remove badly affected fruit. The damaged tissue cannot recover, and removing severely affected fruit allows me to concentrate on improving conditions for the remaining crop.
4. Can overwatering cause blossom end rot?
It can contribute indirectly. Excessively wet soil can damage roots and interfere with healthy water and nutrient uptake. The goal is consistent moisture rather than simply giving plants as much water as possible.
5. Does adding calcium stop blossom end rot?
Not necessarily. If the soil already contains sufficient calcium, adding more may not solve the problem. Consistent moisture and healthy roots are often more important. If a genuine calcium deficiency is suspected, soil testing can help determine whether an amendment is appropriate.
6. Will Epsom salts cure blossom end rot?
No. Epsom salts supply magnesium rather than calcium, so they aren’t a direct treatment for blossom end rot. I wouldn’t use them unless there is a specific reason to correct a magnesium deficiency.
7. Can mulch help prevent blossom end rot?
Yes. Mulch can reduce evaporation and help the soil maintain more consistent moisture, which is one of the most useful things you can do to reduce the risk of blossom end rot.
8. Can blossom end rot happen to peppers?
Yes. Peppers and several other fruiting vegetables can develop blossom end rot, particularly when growing conditions cause inconsistent water uptake.
9. Why do my first tomatoes have blossom end rot?
Early fruit can sometimes be particularly susceptible while plants are establishing themselves and rapidly developing. If growing conditions become more consistent, later fruit may develop normally.
10. Should I use lime on tomatoes with blossom end rot?
I wouldn’t automatically use lime. Lime adds calcium and affects soil pH, so adding it without knowing whether your soil actually needs it can create another problem. A soil test is the better starting point.
11. Does blossom end rot spread?
No. It isn’t contagious and doesn’t spread from one tomato plant to another like a fungal or bacterial disease.
12. What is the best way to prevent blossom end rot?
For me, the biggest priority is maintaining consistent soil moisture. I combine that with mulching, sensible feeding, careful root management, suitable containers, and good general plant care.
Final Thoughts: How I Keep Blossom End Rot Under Control
Blossom end rot can look alarming, but I’ve learned not to let that ugly brown patch ruin my enthusiasm for growing tomatoes.
The key is understanding that blossom end rot isn’t usually as simple as “there isn’t enough calcium in the soil.”
Instead, it’s often about the plant’s ability to take up and distribute calcium while fruit is developing. Consistent access to water is a huge part of that process.
For me, the best approach is simple gardening rather than complicated treatments.
I keep the soil evenly moist, mulch around plants, avoid damaging roots, feed sensibly, give plants enough space, and pay particular attention to container-grown crops during hot weather.
And if I find an affected tomato, I don’t panic.
I remove the damaged fruit, correct whatever growing conditions might be contributing to the problem, and keep caring for the plant.
Quite often, the next tomatoes are perfectly healthy.
That’s one of the things I love about gardening. Even when something goes wrong, the garden gives me another chance. A damaged tomato today doesn’t have to mean a disappointing harvest tomorrow.
With a little consistency and observation, blossom end rot is usually something I can manage rather than something I have to fear.